
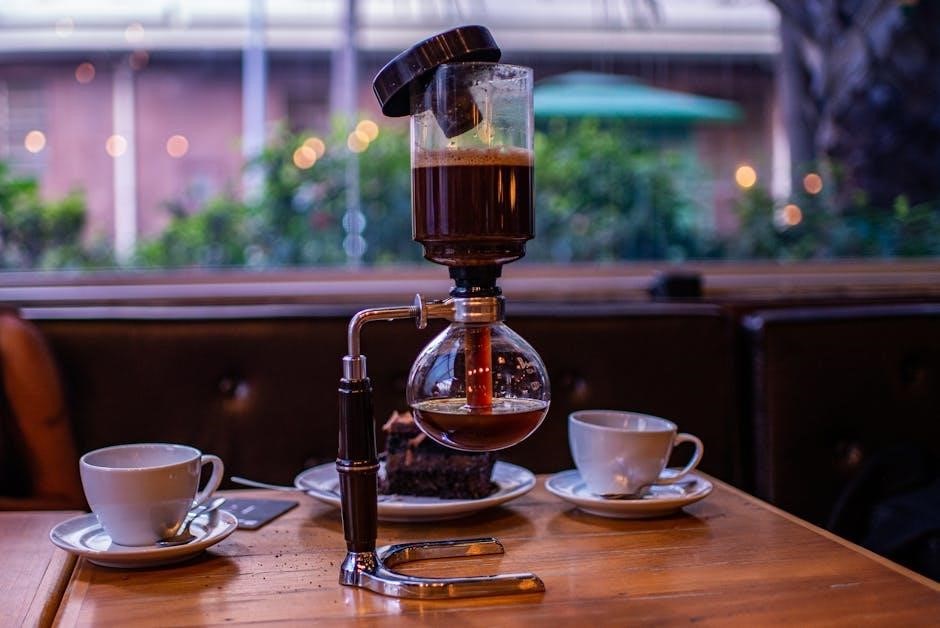
Cafe coffee makers, like Philips Café Gaia and Krups models, offer diverse brewing options. Understanding your machine’s manual—whether a PDF or printed guide—is crucial for optimal performance and longevity.
What is a Cafe Coffee Maker?
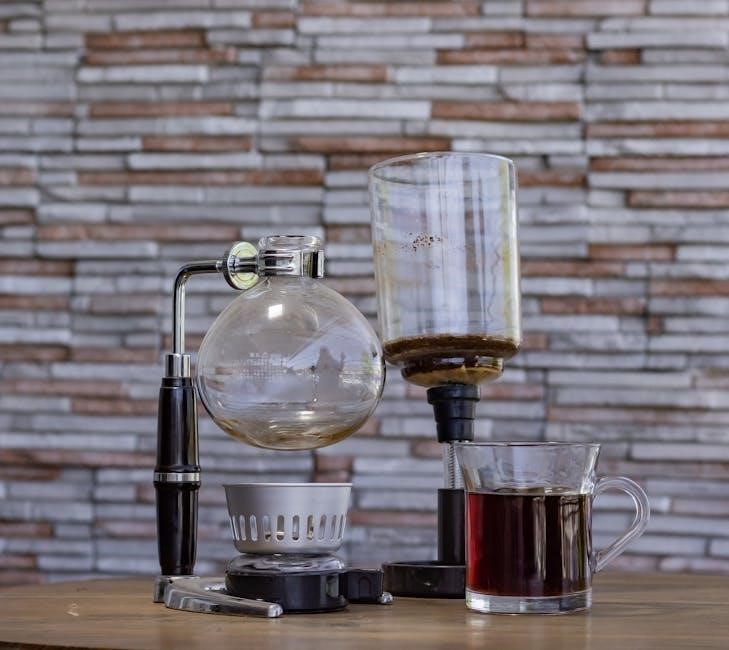
A cafe coffee maker is a home appliance designed to replicate the coffee experience found in cafes. These machines range from simple drip models to sophisticated espresso machines and convenient pod systems, like those from Philips and Krups.
Crucially, each type requires understanding its specific manual for proper operation. Manuals detail everything from initial setup – unboxing, cleaning, and water cycles – to brewing techniques. They also cover safety precautions, troubleshooting, and maintenance, ensuring efficient operation and extending the lifespan of your appliance. Ignoring the manual can lead to suboptimal coffee or even damage.
Types of Cafe Coffee Makers (Drip, Espresso, Pod)
Cafe coffee makers broadly fall into three categories: drip, espresso, and pod machines. Drip coffee makers, often detailed in manuals like those for Philips models, are simple and automated. Espresso machines, such as the DeLonghi ECAM25.46X, require more skill – grinding, tamping, and precise brewing, all explained in their guides.
Pod machines prioritize convenience, using pre-portioned coffee pods. Each type’s manual outlines specific instructions for operation, cleaning, and troubleshooting. Always consult your machine’s manual for optimal results and safety.

Safety Precautions
Always read the safety instructions leaflet before operating your coffee machine to prevent harm and damage, as emphasized in many cafe coffee maker manuals.
General Safety Guidelines
Before initial use, carefully remove all packaging materials, stickers, and protective films from the appliance and its accessories. Thoroughly review the entire instruction manual to familiarize yourself with the coffee maker’s operation and safety features. Never operate the machine if the cord or plug is damaged.
Avoid using extension cords; plug directly into a grounded outlet. Do not immerse the appliance, cord, or plug in water or other liquids. Ensure the coffee maker is placed on a stable, heat-resistant surface. Keep it away from flammable materials and always supervise during operation.
Electrical Safety
Always ensure the voltage indicated on the appliance corresponds to the main voltage of your power supply. Never operate the coffee maker with a damaged cord or plug. If the cord is damaged, it must be replaced by the manufacturer or a qualified technician to avoid hazards.
Do not pull or carry the appliance by the cord, and avoid bending or pinching the cord. Unplug the coffee maker from the outlet when not in use and before cleaning. Never attempt to disassemble or repair the appliance yourself; refer to qualified service personnel.
Avoiding Burns and Scalds
Exercise extreme caution when operating your cafe coffee maker, as hot water and steam are involved. Avoid touching hot surfaces, such as the carafe, heating plate, or steam wand. Use handles or knobs, and allow the appliance to cool completely before cleaning or storing.
Never open the brewing chamber during operation. Keep children and pets away from the coffee maker during and immediately after use. Be mindful of escaping steam, and direct it away from your body to prevent scalding.

Parts Identification
Familiarize yourself with your cafe coffee maker’s components: exterior casing, water reservoir, filter basket, carafe, and portafilter (for espresso models), as detailed in the manual.
Exterior Components
The exterior of your cafe coffee maker typically includes the main housing, control panel with buttons for operation, and a viewing window to monitor the brewing process. Some models, like the DeLonghi ECAM25.46X, feature sleek designs.
Pay attention to the appliance’s base, ensuring stability. Locate the power cord and its connection point. The manual will illustrate these parts, often with diagrams.
Inspect for any removable trays designed to catch drips or spills, facilitating easy cleanup. Understanding the location of these exterior features, as outlined in your user guide, is essential for safe and efficient operation.
Interior Components (Water Reservoir, Filter Basket, Carafe)
Inside your cafe coffee maker, the water reservoir holds the water for brewing; consult your manual for maximum fill levels; The filter basket securely holds the coffee filter and grounds, impacting brew quality.
The carafe, often glass, collects the brewed coffee. Some models utilize thermal carafes for temperature retention.
Your user manual will detail the proper placement and function of each component, including cleaning instructions. Understanding these interior parts—like those in Philips Café Gaia—ensures optimal performance and prevents damage during operation and maintenance.
Removable Parts and Their Functions
Cafe coffee makers feature several removable parts for easy cleaning and maintenance. These typically include the water reservoir, filter basket, and carafe, as highlighted in manuals like those for Krups Cafe Voyager.
The portafilter (in espresso machines) and pod holder (in pod machines) are also removable.
Your user manual details how to safely remove, clean, and reassemble each part. Proper care of these components—following instructions—is vital for extending the lifespan and ensuring the consistent quality of your brewed coffee.
First-Time Setup
Before first use, carefully unbox your cafe coffee maker, inspect for damage, and thoroughly clean all parts as detailed in the provided manual.
Unboxing and Inspection
Carefully remove the cafe coffee maker and all included accessories from the packaging. Retain the box and packing materials for potential future transport or warranty claims. Thoroughly inspect the appliance for any visible signs of damage that may have occurred during shipping, such as dents, scratches, or broken parts.
Verify that all components listed in the manual are present, including the carafe, filter basket, measuring scoop, and any included water filters. If any damage or missing parts are discovered, immediately contact the retailer or manufacturer for assistance before attempting to operate the machine. Refer to the warranty information for specific instructions.
Cleaning Before First Use
Before brewing your first pot, it’s essential to thoroughly clean your new cafe coffee maker. Remove all packaging materials and stickers. Wash the carafe, filter basket, and any other removable parts with warm, soapy water. Rinse these components completely to remove any soap residue.
Wipe down the exterior of the coffee maker with a damp cloth. Avoid using abrasive cleaners, as they can damage the finish. Do not immerse the coffee maker base in water. This initial cleaning process ensures a fresh and hygienic brewing experience, removing any manufacturing residue.
Initial Water Cycle
After cleaning, perform an initial water cycle to flush the system. Fill the water reservoir to its maximum capacity with fresh, clean water. Place the carafe securely on the warming plate, ensuring the filter basket is in place – even without coffee grounds. Run a full brewing cycle without coffee.
Discard the water from the carafe. Repeat this process one or two more times. This removes any remaining manufacturing residue and primes the internal piping for efficient operation, ensuring your first brewed coffee tastes its best.

Making Coffee ─ Drip Coffee Makers
Drip coffee makers require adding water to the reservoir and grounds to the filter. Then, simply operate the machine, adjusting strength as desired for perfect results.
Adding Water and Coffee Grounds
Before brewing, carefully fill the water reservoir to the desired level, ensuring not to exceed the maximum fill line indicated. Use fresh, filtered water for the best-tasting coffee. Next, insert a paper filter (or reusable filter) into the filter basket.
Measure the appropriate amount of coffee grounds – a general guideline is two tablespoons per six ounces of water, but adjust to your preference. Pour the grounds evenly into the filter. Close the lid securely, preparing the machine for operation. Following these steps ensures a flavorful brew.
Operating the Drip Coffee Maker
To begin brewing, ensure the carafe is properly positioned on the warming plate. Press the power button to initiate the brewing cycle. Some models feature programmable timers, allowing you to schedule brewing in advance. Monitor the process as hot water drips through the grounds, filling the carafe with freshly brewed coffee.
Once brewing is complete, the machine may automatically switch to a warming mode; Always unplug the coffee maker when not in use for safety and energy conservation.
Adjusting Coffee Strength
Coffee strength is easily customized by altering the coffee-to-water ratio. For a bolder flavor, use more coffee grounds per cup. Conversely, less grounds yield a milder brew. Some drip coffee makers offer a “strong” or “bold” setting, automatically adjusting brewing parameters.
Experimenting with different grind sizes also impacts strength; finer grinds extract more flavor. Refer to your machine’s manual for specific recommendations regarding optimal ratios and settings.

Making Coffee ─ Espresso Machines
Espresso machines, like DeLonghi ECAM25.46X, require precise grinding and tamping for optimal extraction, as detailed in the user manual for best results.
Grinding Coffee Beans
Achieving the correct grind is paramount for excellent espresso. Your cafe coffee maker manual will specify the ideal grind size – typically fine, but varying by machine. Using pre-ground coffee is an option, however, freshly grinding beans immediately before brewing unlocks maximum flavor and aroma.
Avoid overly coarse or fine grinds; coarse grinds lead to weak, under-extracted espresso, while fine grinds can cause bitterness and machine clogging. Some machines, like certain DeLonghi models, feature integrated grinders with adjustable settings. Always consult your manual for specific recommendations and cleaning instructions for the grinder component.
Tamping and Portafilter Preparation
Proper tamping is essential for even espresso extraction. Your cafe coffee maker manual will detail the correct tamping pressure – generally around 30 pounds. Distribute the ground coffee evenly within the portafilter basket before tamping.
Consistent tamping creates a uniform puck, preventing channeling (water finding the path of least resistance); Ensure the tamper fits the portafilter basket snugly. After tamping, level the coffee bed. A poorly prepared portafilter results in uneven extraction and compromised espresso quality; refer to your manual for visual guides.
Brewing Espresso
Consult your cafe coffee maker manual for specific brewing instructions, as timings vary by model. Typically, insert the prepared portafilter firmly into the group head and immediately initiate the brewing cycle. Aim for an extraction time of 20-30 seconds, yielding approximately 20-30cc of espresso.
Observe the espresso stream; it should resemble warm honey. Adjust grind size and tamping pressure if the extraction is too fast or slow. Refer to troubleshooting sections in your manual for common issues and solutions to achieve optimal espresso quality.
Making Coffee ⏤ Pod Machines
Your cafe coffee maker manual details compatible pod types. Insert a pod, ensuring proper alignment, and follow the machine’s instructions for brewing a single serving.
Inserting Coffee Pods
Refer to your cafe coffee maker manual for specific pod chamber locations and opening mechanisms. Generally, lift the handle or open the designated pod compartment. Ensure the machine is off before inserting a pod to prevent accidental activation. Align the pod correctly, often with a flat side facing up or towards a specific indicator.
Close the pod compartment securely until it clicks, confirming the pod is properly seated. Incorrect insertion can lead to weak coffee or machine malfunctions. Some machines require a specific pod type; consult the manual for compatibility details. Always dispose of used pods responsibly, following local recycling guidelines.
Operating the Pod Machine
Consult your cafe coffee maker manual before initial use. Typically, fill the water reservoir and ensure the pod is correctly inserted. Power on the machine and select your desired brew size – often single or double shot options are available. Press the brew button; the machine will automatically pierce and brew the coffee.
Allow the brewing cycle to complete fully. Some models feature programmable settings or strength controls; refer to the manual for customization. Always exercise caution as the dispensed coffee will be hot. After brewing, safely dispose of the used pod.
Pod Compatibility
Your cafe coffee maker manual explicitly details compatible pod types. Using unsupported pods can damage the machine or result in suboptimal brewing. Most pod machines are designed for specific pod formats – often proprietary systems or widely available standards like Nespresso;
Always verify pod compatibility before use to avoid malfunctions. Attempting to use incorrect pods may void your warranty. Refer to the manual’s troubleshooting section if you encounter issues related to pod insertion or brewing.
Cleaning and Maintenance
The cafe coffee maker manual outlines daily cleaning, descaling, and carafe/filter basket care. Regular maintenance ensures optimal performance and extends the machine’s lifespan.
Daily Cleaning
Your cafe coffee maker manual stresses the importance of daily cleaning for hygiene and performance. After each use, discard used coffee grounds and rinse the filter basket thoroughly with warm water. The carafe should also be washed with soap and water, ensuring all coffee residue is removed.
Wipe down the exterior of the machine with a damp cloth. Avoid abrasive cleaners, as they can damage the finish. Regularly check and empty the drip tray to prevent overflow. Following these simple steps, as detailed in your manual, will maintain your coffee maker’s cleanliness and brewing quality.
Descaling the Coffee Maker
Your cafe coffee maker manual likely details a descaling process to remove mineral buildup. Over time, limescale can affect brewing performance and coffee taste. Typically, this involves running a descaling solution (or a mixture of water and vinegar, as some manuals suggest) through the machine’s water reservoir.
Follow the manual’s specific instructions regarding solution concentration and the number of brewing cycles needed. Rinse thoroughly with fresh water afterward to eliminate any residual descaling agent, ensuring a clean, flavorful brew.
Cleaning the Carafe and Filter Basket
The cafe coffee maker manual emphasizes regular cleaning of the carafe and filter basket. After each use, discard used coffee grounds and rinse both components with warm, soapy water. For stubborn stains in the carafe, a gentle scrubbing with a non-abrasive sponge is recommended.
Ensure thorough rinsing to remove all soap residue. Some manuals advise dishwasher-safe components; verify this before placing them in the dishwasher to avoid damage. A clean carafe and basket contribute to better coffee flavor.
Troubleshooting Common Issues
The cafe coffee maker manual guides users through fixes for issues like the machine not turning on, slow brewing, or weak/bitter coffee—ensuring optimal function.
Coffee Maker Not Turning On
If your cafe coffee maker fails to power on, consult the manual first. Verify the power cord is securely connected to both the machine and a functioning outlet. Check if a fuse has blown or a circuit breaker tripped.
Some models feature safety mechanisms; ensure the water reservoir is properly seated and the carafe is in place. Refer to the troubleshooting section of your specific model’s manual for detailed guidance, as different machines have unique power-related considerations. A manual provides diagrams and specific steps.
Coffee Brewing Too Slowly
Slow brewing often indicates a blockage or buildup. Your cafe coffee maker’s manual likely details descaling procedures to remove mineral deposits. Ensure the filter basket isn’t overfilled or clogged with grounds. Inspect the spray head for obstructions, referencing the manual’s diagrams for location.
A slow drip can also signal the need for cleaning internal piping, as mentioned in some manuals. Regularly following the maintenance schedule outlined in your user guide prevents this issue.
Weak or Bitter Coffee
Weak coffee often results from insufficient coffee grounds; consult your manual for recommended ratios. Conversely, bitter coffee can stem from using too fine a grind, especially with espresso machines – adjust your grinder accordingly. Over-extraction, also detailed in the manual, contributes to bitterness.
Ensure proper water temperature, as inconsistent heat impacts flavor. Regularly cleaning, as the manual instructs, prevents stale residue from affecting the brew. Experiment with grind size and coffee quantity.
Advanced Features (If Applicable)
Many cafe coffee makers boast programmable timers and automatic shut-off features; your manual details setup. Some models include water filtration for enhanced flavor.
Programmable Timers
Programmable timers allow you to schedule brewing in advance, ensuring a fresh pot awaits you upon waking or returning home. Consult your cafe coffee maker’s manual for specific instructions on setting the timer. Typically, this involves pressing a “Program” or “Timer” button, then setting the desired brew start time using hour and minute controls.
Remember to confirm the current time is accurately set before programming. Some models allow multiple timer settings for different days of the week. Always double-check the settings to avoid unexpected brewing times, and ensure sufficient water and coffee grounds are present for the programmed brew.
Automatic Shut-Off
Automatic shut-off is a vital safety feature found in many cafe coffee makers. This function automatically turns the machine off after a period of inactivity, preventing overheating and conserving energy. Your coffee maker’s manual will specify the shut-off duration, typically ranging from 30 minutes to several hours.
This feature provides peace of mind, especially if you accidentally leave the machine on. However, it’s important to note that relying solely on automatic shut-off isn’t a substitute for responsible operation and regular monitoring of your appliance.
Water Filtration Systems
Many cafe coffee makers incorporate water filtration systems to enhance coffee flavor and prolong machine life. These systems, often utilizing charcoal filters, reduce chlorine, calcium, and other impurities present in tap water. Your coffee maker’s manual will detail filter replacement frequency – typically every 2-3 months, or after a specific number of brewing cycles.
Using filtered water results in a cleaner, brighter coffee taste and minimizes scale buildup within the machine, contributing to consistent performance and reduced maintenance needs.
Warranty Information
Your cafe coffee maker is covered by a warranty; consult the manual for specific details regarding coverage duration and claim procedures for defects.
Warranty Coverage
The warranty for your cafe coffee maker, as detailed in the accompanying manual, typically covers defects in materials and workmanship under normal household use. This generally excludes damage resulting from misuse, accidents, unauthorized repairs, or failure to follow operating instructions.
Coverage periods vary by manufacturer and model, often ranging from one to five years. The warranty doesn’t usually cover consumable parts like filters or descaling solutions. Proof of purchase is essential for any warranty claim, so retain your receipt or online order confirmation. Refer to the manual for complete terms and conditions.
How to Claim Warranty
To initiate a warranty claim for your cafe coffee maker, consult the manual for specific instructions. Generally, you’ll need to contact the manufacturer’s customer support, providing your model number, serial number, proof of purchase, and a detailed description of the defect.
Some manufacturers require you to ship the appliance to an authorized service center for inspection and repair. Others may offer on-site service or replacement options. Carefully follow the outlined procedures to ensure a smooth and efficient claim process.
Frequently Asked Questions (FAQ)
Q: Where can I find my coffee maker’s manual? A: Check the manufacturer’s website (Philips, Krups, DeLonghi) for downloadable PDFs. Q: What if I lost the physical manual? A: Online versions are readily available. Q: How often should I descale? A: Refer to your manual; frequency varies based on water hardness.
Q: Can I use any coffee pod? A: Compatibility depends on your machine; check the manual. Q: How do I test my internet speed? A: Use Speedtest by Ookla for accurate results.